


Tuesday, July 2, 2013
Alpha Numeric Auto Increment in .net
Alpha Numeric Increment in .net
private voidbutton1_Click(object sender, System.EventArgs e)
{
label1.Text = NxtKeyCode( textBox1.Text );
textBox1.Text =label1.Text;
}
public stringNxtKeyCode(string KeyCode)
{
byte[] ASCIIValues = ASCIIEncoding.ASCII.GetBytes(KeyCode) ;
int StringLength = ASCIIValues.Length ;
bool isAllZed = true;
bool isAllNine = true;
//Check if all has ZZZ.... then do nothing just return empty string.
for(int i =0; i < StringLength-1; i++)
{
if(ASCIIValues[i] != 90)
{
isAllZed = false;
break;
}
}
if(isAllZed && ASCIIValues[StringLength-1] == 57)
{
ASCIIValues[StringLength-1] = 64;
}
// Check if all has 999... then make it A0
for(int i =0; i < StringLength; i++)
{
if(ASCIIValues[i] != 57)
{
isAllNine = false;
break;
}
}
if(isAllNine)
{
ASCIIValues[StringLength-1] = 47;
ASCIIValues[0] = 65;
for(int i =1; i < StringLength-1; i++)
{
ASCIIValues[i] = 48;
}
}
for(int i = StringLength; i>0; i--)
{
if(i-StringLength == 0)
{
ASCIIValues[i-1] +=1;
}
if(ASCIIValues[i-1] == 58)
{
ASCIIValues[i-1] = 48;
if(i-2 ==-1)
{
break;
}
ASCIIValues[i-2] += 1;
}
else if(ASCIIValues[i-1] == 91)
{
ASCIIValues[i-1] = 65;
if(i-2 ==-1)
{
break;
}
ASCIIValues[i-2] += 1;
}
else
{
break;
}
}
KeyCode = ASCIIEncoding.ASCII.GetString(ASCIIValues);
return KeyCode;
}
public stringNxtKeyCod(string KeyCode)
{
//int startint = KeyCode.IndexOf("0123456789",0,1);
StringBuilder sb = newStringBuilder();
//Regex digitregex = new Regex("^[A-Z])");
//KeyCode = digitregex.Replace(KeyCode, "");
return KeyCode;
}
DESIGN

OUTPUT

To Get Mother Board and Processor informations
System Information
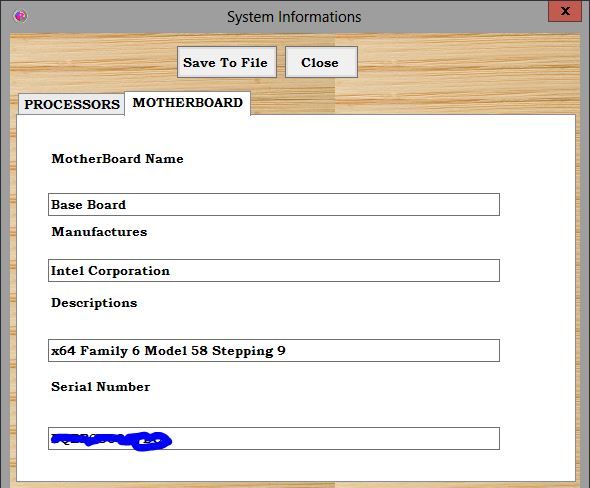
Mother Board Information
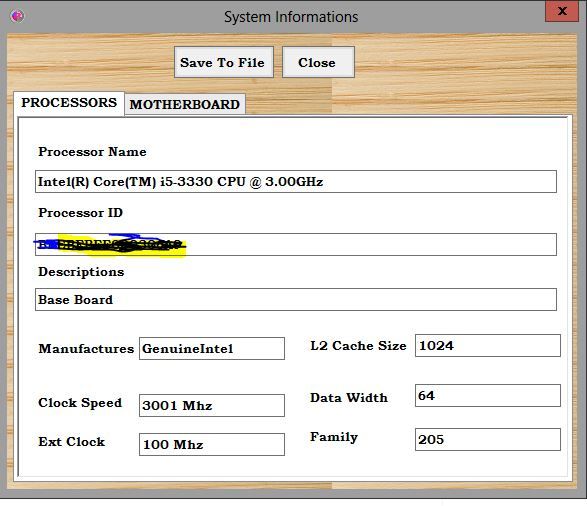
System Information

To Save Systrm Information File
Click Here To Download System Information file
How To Enable Write Protection Of USB Devices Under Windows
You have probably seen the following scenario in multiple thriller and spy movies; A spy connects an USB stick to a computer to copy data from the computer to the device. Movies do not necessarily reflect reality but there is some truth to this scenario after all. It is indeed possible to connect an USB device to a computer running Windows to copy data from that computer to the removable storage device.
It is sometimes in the best interest of companies, organizations and individuals to protect the data on their computer from being copied this way.
Microsoft has added options to the Windows operating system (more precisely to Windows XP and newer operating systems) to write protect all USB devices that are connected to it. This indicates that it may not always be possible to protect the computer this way, for instance if data needs to be written to USB devices regularly.
Write Protection adds another layer of defense to the computer. The system is not fool proof on its own, as it is still possible to copy data, for instance by uploading it to the Internet or a network connection.
Write Protecting USB Devices
You can enable or disable write protection of all USB devices that are connected to the Windows operating system. Both settings are configured in the Windows Registry. Here is how this is done.
Open the Windows Registry editor with the shortcut Windows-r, enter regedit into the form and press the return key on the keyboard.
Navigate to the following Registry key:
HKEY_LOCAL_MACHINE\SYSTEM\CurrentControlSet\Control\StorageDevicePolicies
Please note that you may need to create the key StorageDevicePolicies if it does not exist. Select the key afterwards and right-click into the right window. Select New > Dword (32-bit) Value from the context menu and name the entry WriteProtect.
Double-click the new entry afterwards and change the value from 0 to 1. A value of 1 disables writing to all connected USB devices. If you want to enable writing again you need to change the value of the key to 0.
 The new setting takes effect immediately. Every user who tries to copy data to USB devices with write protection enabled receives the following notification window.
 It reads
Copy File
The disk is write-protected
Remove the write-protection or use another disk.
I have created two Registry files to enable or disable write protection. You can download a zip file that contains both files here: write protect
This way you can disable write protection with a click on a file, and enable it again when you have copied files to the USB device.
HKEY_LOCAL_MACHINE\SYSTEM\CurrentControlSet\Control\StorageDevicePolicies


Copy File
The disk is write-protected
Remove the write-protection or use another disk.
The disk is write-protected
Remove the write-protection or use another disk.
Subscribe to:
Comments (Atom)


.jpg)


