TTX file defines the fields. The names of these fields should be the same as of the names of the Properties that user wants to display in the report. The name of the TTX file should be the same as of the name of Class. One TTX file defines for one Class only. For example, If you want to show all the Equipments. One TTX file named EQUIPMENT.ttx should be defined. If you create TTX file named EQUIPMENT, then this template works for all the classes that are derived from EQUIPMENT like PUMP, VESSEL etc. But if you define PUMP.ttx, it will not work for EQUIPMENT class i.e. it supports the polymorphic behavior.
The table name (Or name of TTX file) should be the same
The table name (Or name of TTX file) should be the same
- Open Crystal Report.
- Goto File -> New -> Blank Reports.
- In the Database Expert dialog, select "Field Definitions Only".
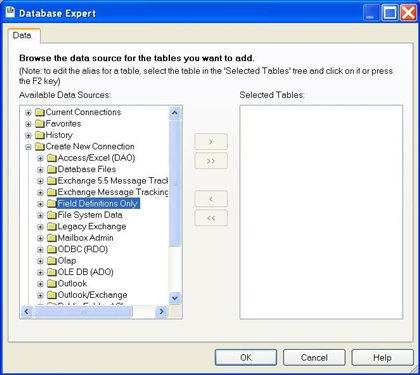
- Expand Field Definitions Only, dialog is launched.
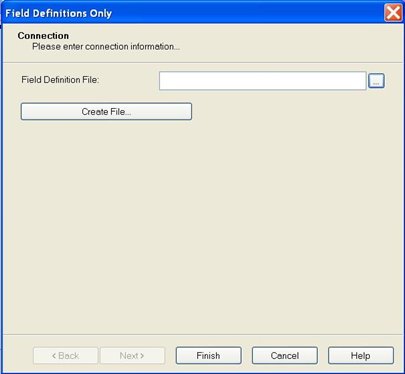
- In the Field Definitions Only dialog, you can either Open an existing TTX file Or Create and Define a new one.
- Define fields for new TTX file (Add names of properties you want to display in the report like NAME, DESCRIPTION, MATERIAL, MODEL , MANUFACTURER).
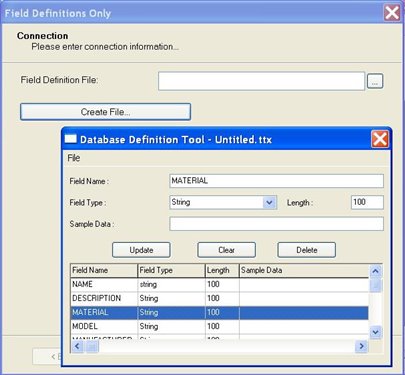
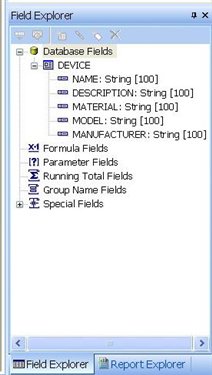
- Close the form and save the file with the name DEVICE.ttx (The properties selected in this example are of DEVICE class of OpenPlant Schema).
- Press Finish in Field Definitions Only dialog.
- On Database Expert dialog, select the newly created connection named "DEVICE".
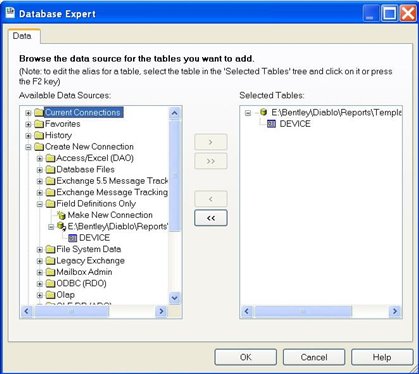
- Press OK on Database Expert dialog.
- New connection fields are listed in Field Explorer dialog (normally docked at the bottom right corner of the application. It can be made visible from View -> Field Explorer). You can drag and drop the fields on the work area and adjust its settings (Font, Position etc) accordingly.
- One Important Thing: Click on File -> Page Setup option and Check the "No Printer (optimize for screen display) option.

Using Crystal Report template in OpenPlant PowerPID
Creating template
- In OpenPlant PowerPID, launch Report dialog using Utilities -> Reports.
- Click on "New Report" button Or Right Click and press Edit on any report.
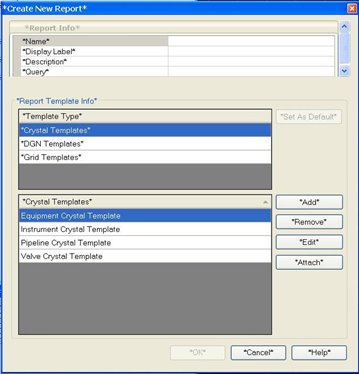
- Press Add Button to add the crystal report template created in previous section.
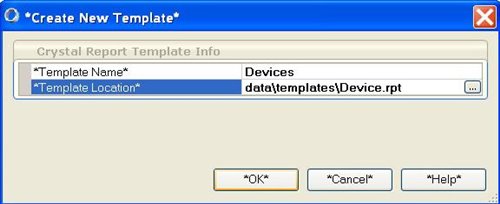
- Press OK to create new template.
- Template will appear in the list.
Creating ECQuery for template
- On the Create New Report dialog, add name, description etc for new report.
- Create a Query by pressing ... on the Query textbox in Report Info section.
- Select Device class Or Any class derived from Device at any level (Like the same template can be used for Equipment, Instruments etc). Don't forget to click the highlighted icon to support polymorphism.

- Click OK to define the Query.
Creating Crystal Report template for Related Instances
Repeat the steps (3 - 10, select "Field Definitions Only" in Database Expert dialog - Press OK on Database Expert dialog.) mentioned in the above section "Creating a TTX file in Crystal Reports" and create TTX files for both main and related class. For example: If you want to show PipeLines and related PipeRun data, you have to create 2 connections (TTX files) for PIPING_NETWORK_SEGMENT and PIPING_NETWORK_SYSTEM.
Defining TTX and Linking Related Tables
- These 2 tables in crystal report need to be linked together to show related data correctly.
- You need to define an additional FIELD in TTX file named instanceID of type String in both TTX files.
- Link these 2 tables in Database Expert dialog. Select Database -> Database Expert menu item.
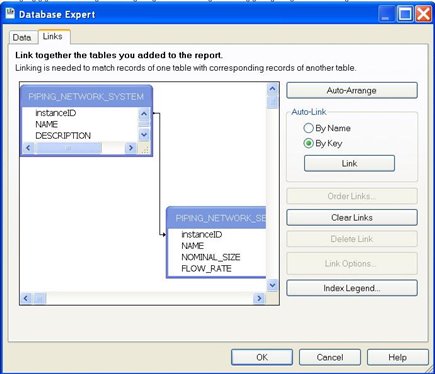
- Press Clear Links button.
- Create a new link between instanceID fields (from PIPING_NETWORK_SYSTEM to PIPING_NETWORK_SEGMENT) of both tables using drag and drop.
- Double Click on the link to edit it and select appropriate options.
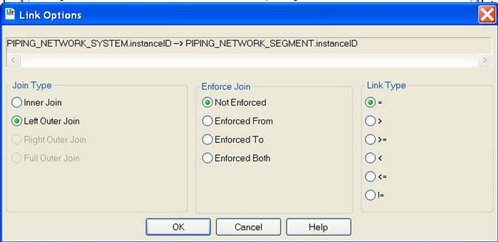
- Click OK in Link Options and Database Expert dialog.
- A warning message may appear. Ignore it.
Creating Group
- Select Insert -> Group menu item.
- Choose the Field you want to group with. In this example, NAME field of PIPING_NETWORK_SYSTEM is chosen as this can identify each Pipeline.
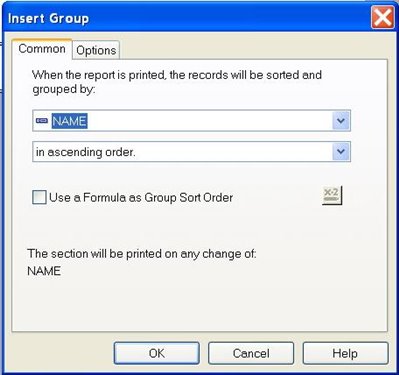
- Press OK. It will create a new Group Header section.
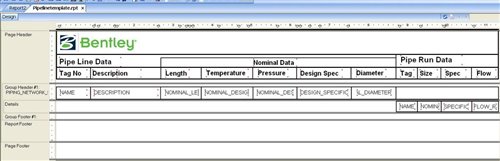
- You can drag and drop the fields of the main table i.e. PIPING_NETWORK_SYSTEM into the Group section.
- Drag and drop the fields of related table i.e. PIPING_NETWORK_SEGMENT into the Details section.
Report is ready to be consumed from within OpenPlant PowerPID


.jpg)


0 comments:
Post a Comment