


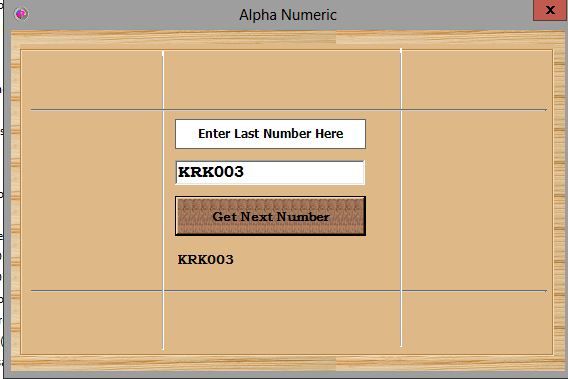
Alpha Numeric Increment in .net
private voidbutton1_Click(object sender, System.EventArgs e)
{
label1.Text = NxtKeyCode( textBox1.Text );
textBox1.Text =label1.Text;
}
public stringNxtKeyCode(string KeyCode)
{
byte[] ASCIIValues = ASCIIEncoding.ASCII.GetBytes(KeyCode) ;
int StringLength = ASCIIValues.Length ;
bool isAllZed = true;
bool isAllNine = true;
//Check if all has ZZZ.... then do nothing just return empty string.
for(int i =0; i < StringLength-1; i++)
{
if(ASCIIValues[i] != 90)
{
isAllZed = false;
break;
}
}
if(isAllZed && ASCIIValues[StringLength-1] == 57)
{
ASCIIValues[StringLength-1] = 64;
}
// Check if all has 999... then make it A0
for(int i =0; i < StringLength; i++)
{
if(ASCIIValues[i] != 57)
{
isAllNine = false;
break;
}
}
if(isAllNine)
{
ASCIIValues[StringLength-1] = 47;
ASCIIValues[0] = 65;
for(int i =1; i < StringLength-1; i++)
{
ASCIIValues[i] = 48;
}
}
for(int i = StringLength; i>0; i--)
{
if(i-StringLength == 0)
{
ASCIIValues[i-1] +=1;
}
if(ASCIIValues[i-1] == 58)
{
ASCIIValues[i-1] = 48;
if(i-2 ==-1)
{
break;
}
ASCIIValues[i-2] += 1;
}
else if(ASCIIValues[i-1] == 91)
{
ASCIIValues[i-1] = 65;
if(i-2 ==-1)
{
break;
}
ASCIIValues[i-2] += 1;
}
else
{
break;
}
}
KeyCode = ASCIIEncoding.ASCII.GetString(ASCIIValues);
return KeyCode;
}
public stringNxtKeyCod(string KeyCode)
{
//int startint = KeyCode.IndexOf("0123456789",0,1);
StringBuilder sb = newStringBuilder();
//Regex digitregex = new Regex("^[A-Z])");
//KeyCode = digitregex.Replace(KeyCode, "");
return KeyCode;
}
DESIGN
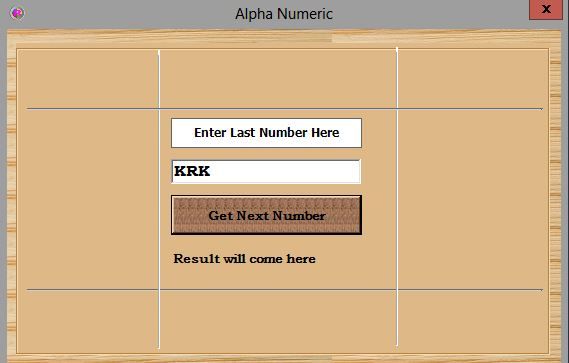
OUTPUT


![CropperCapture[7]](http://www2.nextofwindows.com/wp-content/uploads/2012/05/CropperCapture71.gif "CropperCapture[7]")


.jpg)


